Monday, October 26, 2009

Kenwood D710 and Nuvi 350 usage.

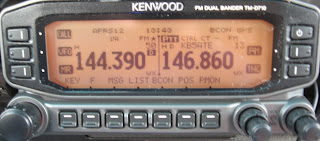
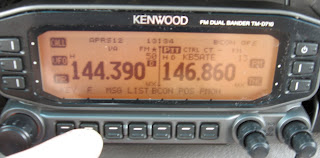
So last time I showed the settings, this time I show what you get.Along the radios on the bottom row you see a row of labels. ALL of them have to do with APRS.
MSG is a list of inbound and outbound messages.
LIST is a list of other APRS stations...that you have received.
BCON is your radios APRS beacon setting (on or off)
POS is where the radio thinks you are...based on the last GPS input or your manual input.
P.MON monitors the position data your radio is getting/sending.

So if you push MSG, you get this screen.
I blurred out the callsigns to protect the innocent...the EMAIL ones are where I have attempted (and failed) to send out an EMAIL from the radio. the other ones are messages to and from the HT (TH-D7AG) . Note that you can reply or send new messages from this menu.

If you ESC out of that screen and go back to the main radio screen then select-
LIST. you get a listing of about 15 APRS stations the radio has received info from, either via relay or direct.So again I blurred out the callsigns, from here you can send messages also. Note the cursor is on the first entry, If I select this one (using the big knob again) I will get detail, location, info and a direction arrow.

Now to the Nuvi 350 using the GTRANS cable.

When you power the Nuvi up, you get this screen.
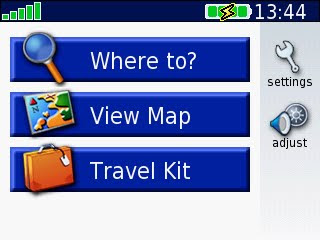
If you select Where To?...
...you get this screen, then select My Locations.
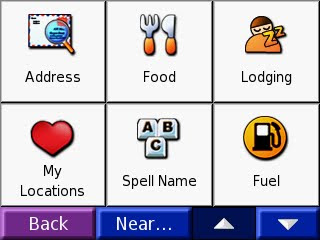
You see this...
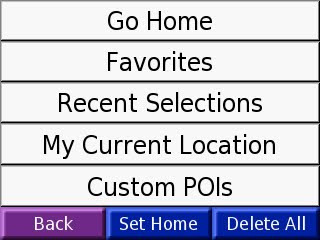
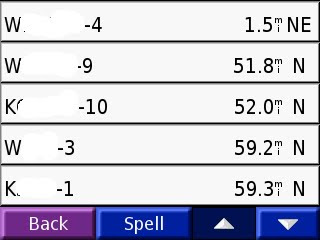
now select Favorites.

At first this will probably be blank, but as your radio receives APRS info, it will populate this screen realtime.

It will sort the list from closest to furthest, and if I was moving it would show an arrow pointing to the location in addition to the distance.

I usually just leave the display on this page, and it is humorous when you pass by another APRS user going the other way on the interstate...
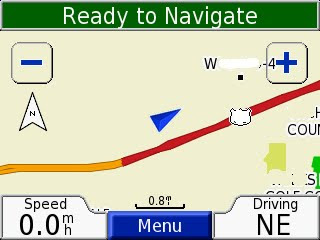
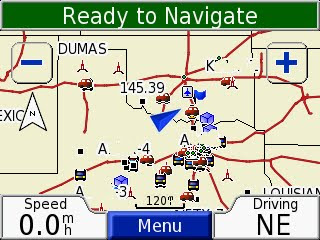
Or from the main menu you can select View Map.

It again automatically populates the maps with the APRS info. It doesn't matter if you have detail turned on or off, and you can zoom all the way in to 120mi out and still see the info.

Note, the Nuvi stores the info, so a APRS station will show, if it is currently online or not...but it's position will be updated if new info arrives...so you will have to compare this to the Radio list.


So that covers basic setup and usage. If I learn more, I may add or correct these pages.
Kenwood TM-D710, Garmin Nuvi 350 APRS setup

I guess this is sort of part 2...part one had background and a bunch of links...this part will have a series of photos to set up the radio for APRS...next part will have some usage info.

You can easily do all the APRS setup just off the control head...but to store in memory your favorite channels; the software is a lifesaver.

As we go through the menus...If I don't list one, then I left it default.

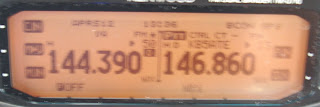
Power it on, and you get your normal display. It doesn't matter which side you set up for APRS, but this one is setup for the A-side. My finger is pointing at the Function button. We will use it to get to the APRS submenu later. To the right of the row of buttons are the volume/squelch/select knobs for the individual side. So my inital step would be to push the left of the two knobs and select side A. (the PTT indicator will move to the left side). I would then push the first button above those two next to the TNC indicator. That will make the left side of the radio show a D and APRS12 (or it might say something else...will will check that in a bit.)

Now when I press the F button, that row of labels changes.
And you see this.Notice the F changed to F OFF.(ha) So you could push the F again and go back to the previous list.
Now when I push the big knob on the left, instead of cycling through the bands, I get a new menu.
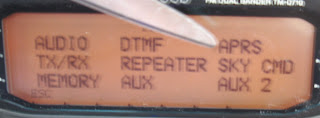
Now rotate the big knob on the left until the cursor flashes at APRS. (the camera can't see the cursor, so the scissors will do.) Then push in on the knob to select the APRS submenu.The next menu that pops up will be whatever you had up last. You rotate the big knob to cycle through the submenus (601,602,...etc)
601 is self explanatory...your callsign. I use the suffix -9 after my callsign for "mobile" on this radio, and -7 on my HT to indicate a D7A.
602 is the GPS setup menu.When you first get the radio, the INPUT will probably be NONE. So push in on the big knob again to move the cursor down to the next line...in this case BAUD RATE. Then rotate the big knob until you get to the INPUT line...push the big knob again and the NONE or GPS will flash...rotate the knob again to change that input.
Then rotate again to select OUTPUT, and change that to WAYPOINT.

So understand how to get through the menus, rotate to cycle, push to select...when you are done you can select BACK (using the other radio buttons) to move back one menu or ESC to completely leave the menus. For now, you will want to use BACK as we edit the menus.

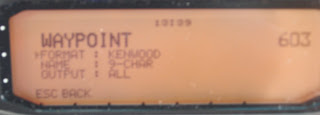
Next menu 603.
This one will be different if you don't use a Nuvi and GTRANS cable.. But these settings work properly for my Nuvi 350. You have to change the first two for sure.
FORMAT is KENWOOD
NAME is 9-CHAR
For other GPS units, search the web.

Next menu 612.
This is kind of neat. I won't get into the background of the settings...because I don't completely understand it all...but what you need to know is that you set everything on two settings.
WIDE 1-1 select ON
TOTAL HOPS select 2 (you can select 3 if you are in a very remote location, but try 2 first.)
The radio automatically fills in the Path for you.

Next menu is 624.Sound is up to the user...I just wanted to point out the settings. You can turn off the beep when your beacon transmits, you can select when to beep when an APRS message occurs. If it beeps too much for you, then start changing settings.

Next menu 625.
Ok, this bugged me until I could find the menu. The default pop up for APRS info is fullscreen...I didn't like that...because you lose view of the frequencies on both sides.

So I dug through the menus until I found this one. Mine is now set up so that the routine APRS info pops up only in the A-side of the radio (note to self, try to take a picture of that). An actual message from someone to you pops up full screen...so you can read it.
You can also chose NONE.

DISPLAY AREA : HALF

APRS is now setup on your Kenwood to use the Nuvi. I just want to point out one more menu.

Under the AUX at the main menu (one prior to APRS).
From AUX, go to menu 529.

There is nothing to change here. I just want to show that if you have the A-side setup for APRS it will show this INTernal DATA BAND A-BAND
There is another PACKET radio setting that will also show the EXTernal band B-BAND.

That is normal if you set it up like mine.

There you go, a picture is worth a thousand text files. Next up, usage.

Thursday, October 15, 2009

Wednesday, October 14, 2009

APRS =TM-D710+ Nuvi 350

I don't think you can have too many hobbies.

9/11 and later Katrina reinforced the fact that you need redundant communications systems...just in case...

So after Katrina I pursued getting an Amateur Radio License (Ham)...
...well let me point out that in times of emergency, when there is a real threat of loss of life or property, everyone is authorized to use any frequency band to summon help if unavailable by any other means...
so I gathered radios, but didn't get the license, until now. The test is straight forward if you use any of the many practice tests available...or just memorize the question bank.

What really made me decide to go legit was the advances in APRS equipment and availability.

APRS (according to the FCC test-Automatic Position Reporting System...according to the folks who made it and use it-Automatic Packet Reporting System) is in its simplest terms, a text messaging system. But it is much more than that.

Think of the radios as part of a giant wireless network (maybe 20 miles apart, depending on antenna height, terrain, power output).

The data is sent via a text format over the radio (like a 1200 baud dial up modem)...but the data can be any number of extremely useful things. Like weather. You could set up a weather station at a remote location without internet, and have APRS transmit the weather data.

I am using it to send my vehicle location as I travel.

Now so far I am sure some out there are saying to themselves...but I can already do that with a cellphone and the internet.

True...but this system still works if the cellular, and landline phone systems are down or saturated (9/11), if power is out/internet out, etc(Katrina).

The practical application is for emergency workers to have this system to mark this location, and be able to send text messages to other emergency workers. It allows a command center to know where the assets are and send them info without worrying about a mistake in copying a voice transmission.

In a later post I will give the details of what gets plugged where, and settings etc. There are some guides out there...but none with this exact setup.

I will also show hooking up the TH-D7AG to the Nuvi 350 later.

In the mean time look at www.aprs.org.