Tuesday, October 23, 2012

Canon camera to Nook Color using USB host mode.

A new project based on this post at Steve's Digicams.   First some links... (writeup is finished...I will add pictures etc later)

Original story I followed...Control Your Canon Camera From Your Android Device
http://www.steves-digicams.com/news/control_your_canon_camera_from_your_android_device.html

Remote Release     https://play.google.com/store/apps/details?id=eu.chainfire.remoterelease
DSLR Controller (BETA)  https://play.google.com/store/apps/details?id=eu.chainfire.dslrcontroller
...or homepage here... http://dslrcontroller.com/

Android device compatibility http://dslrcontroller.com/devices.php

http://forum.xda-developers.com/showthread.php?t=1202082

http://forum.xda-developers.com/showthread.php?t=1369684

i9100 usb host cable

Nook Color Tweaks  https://play.google.com/store/apps/details?id=com.dalingrin.nookcolortweaks
USB Host Controller  https://play.google.com/store/apps/details?id=hu.sztupy.android.usbhostcontroller

Here is the story...

So I have a Nook Color, running CM7 (Cyanogenmod 7) a modified version of Android for the Nook, gives more features than the stock Nook Color OS.

According to the first link, CM7 comes with USB Host Mode enabled ready for the Nook Color.  This allows the Nook to actually access USB devices, mount drives, etc., normally the Nook will simply act as a usb drive when connected to a computer...now it actually acts like the computer.  You need to enable it in software, I used Dalingrin Nook Color Tweaks to do this, but there are some USB host mode apps that should do the same thing.

Other than a Nook Color (in my case) and the software, you need a cable...and it seems that any USB gender changer will work, the link above is to specifically look for a certain type of USB Host Mode adapter.

First test (after I got a cable) was to see if I could read USB devices, card readers etc through the usb port.

Well, I had an older Release Candidate of CM7 and although the options were there, it would not access USB devices...so I wiped my SD card and started over with the current stable version 7.2.

With that version I was able to use some USB devices...specifically a few thumb drives, and my GoPro.  The GoPro acted as a thumbdrive, so I could view the pictures on it.

Next step is the Canon Rebel XS (1000d)

I may probably post some video or pictures of the setup...but really there isn't much too it.  Using the USB Host Controller App really helps in troubleshooting.  If  you have your camera connected (and turned on) and run that app, it will show up in the list of USB devices (second tab) if everything is working right.

If it doesn't show up, check your USB host mode again.

I used the free Remote Release App by Chainfire first to test connectivity between the Nook and the Canon.  That step is recommended by Chainfire to keep folks happy...if that app won't control your camera, then the DSLR Controller App will not control your camera.

When it is up and everything running fine...you will get something like this...


 The app has a lot of options, including HDR (your choice of bracketing) changing ISO and manual focusing.

I really simply wanted a handy way to live view for focusing, and for preview/reviewing pictures...it does that easily.

I have to recommend this if you already have the Nook and the Canon...if you don't have Nook...then go get one!
Sunday, October 7, 2012

Baofeng UV-5R...how do I program it?


I bought the famous (?) $50 Baofeng UV-5R Dual-band amateur HT (walkie talkie) 70CM and 2M.

Because it is $50 the menus for programming it are painful to use, but programming it using software is pretty much like programming any other radio using software.

I will show some steps, and screenshots to walk it through, but for now here is the quick list.

BTW mine has the BFB251 version of the ROM (power on holding the "3" button down).  I just got it about a month ago...they are up to version 293 I believe.


I just got a 251, and just programmed it. Make sure you have the basics
covered.

This blog post has, how to set up USB cable, basic CHIRP instructions, VIP instructions.  (and I am always willing to improve it...just let me know)


Important links


Miklor's Baofeng UV-5R page full of resources

-Miklor's USB driver page

-Miklor's  VIP software page

-Miklor's CHIRP software page

Danplanet THE CHIRP site.


Plug in USB adapter.

1. make sure that your USB cable was installed as a "Prolific USB-to-Serial Comm
Port" (look in Device Manager/Ports)


2. make sure that the driver for that port is Prolific 3.2.0.0
(Properties/Driver)


3. Note what comm port is assigned to that Prolific USB-to-Serial Port (COM )


CHIRP software instructions.

(CHIRP as of 6Oct12, may not support BFB291 or later to to vendor detection issues)

4. When you start CHIRP, make sure it is using the correct serial port.


5. An 'unable to connect to comm port' or some error like that probably means that the driver is wrong

6. An 'unable to connect to radio' type error means you need to make sure the plug is installed all the way (I had to trim a bit of plastic off the bottom of the plug. (or in this case I selected the wrong comm port).


7. make sure you are using the very latest 'daily build' CHIRP software (I have the 5 Oct 2012 version)


Note:  It was suggested to me on the Baofeng yahoo group by Jim (KC9HI) that the latest 'daily build' may not suit your needs.  If it doesn't work, take a look at the Danplanet CHIRP 'Activity Page' to see which version may suit you.

I am not in the CHIRP users group, so I don't follow what is going on there.

I followed the Miklor Chirp page.


VIP Software instructions.


1. Use correct version for radio...the software even tells you which version it is for.


2. The older version opens up in Chinese fonts (which most of us do not have installed...just go to the second pull down menu on the right, and select English.

 Close that front window...don't worry you can get it back later.


3. Now select Comm Port, click the Communication Menu and this window will pop up.


 My adapter was on COM3


4. Download from radio...do this before editing your channels.


 Select 'Read'


Now you can edit if you want.


These are the programmed channels on your radio.


This menu has other optional settings.


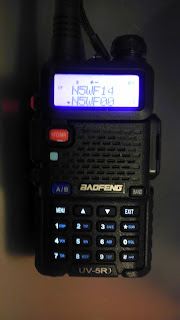
This menu lets you change your power on message...as it says, Read from radio first, then edit and Write back to radio.


How to save and load your hard work...


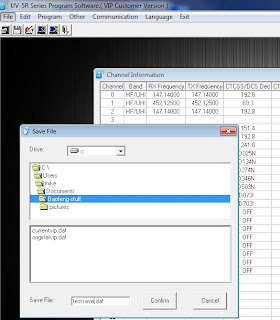
To save your work, File, then "Save".

"Save As" didn't work for me.


It looks like an old Windows 3.1 interface,
so finding the directory you want is a bit clunky...but it works.


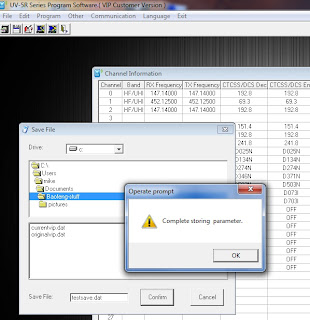
And just type in the name. (.dat) 


That gibberish means it saved correctly. 


To open a file it is the same clunky menu system.


But this time just select the file you want.


And this means you correctly loaded it.


For editing the memories etc...you are on your own, I copied the ones from my other radios, and had to edit them with excel in a format that matched what I downloaded from the radio using CHIRP. (save as csv...then after you are done editing IMPORT back into CHIRP.

I only used the VIP software for changing the power on message.


Wednesday, September 26, 2012

Buffalo HS-DH500GL Hard drive swap

(note: this was in the draft folder for some reason...I did this project over a year ago...)

I picked up the Buffalo HS-DH500GL GigaBit LinkStation a few years ago...I was using it as a portable FTP server for a IP camera capture.

And haven't used it since. So I fired it up and started to use it...and immediately filled the drive. 500GB just doesn't go as far as it used to.

On clearance I picked up a pair of 1.5TB WD My Book Essential USB drives. I figured I could plug them into the LinkStation for more space. Bad idea. Twice the drives went blank...just lost the data, and then both started creating nested directory copies...apparently infinitely. And because of this activity the LinkStation kept overheating and shutting down.

So I had a great idea...I would use those 1.5TB drives for something else. I thought about using them in my ReadyNAS NV+...but they weren't on the approved HD list.

So then I had the bright idea of putting one of the 1.5TB drives into the LinkStation...how hard could that be?

I won't get into disassembly of the LinkStation...there are web sites with that...but it is one screw for the front cover, pull a cable, two screws and slide the drive out, then two screws to remove the interface. The WD My Books are snap together plastic with two screws holding the electronics to the drive.

Needless to say I did a lot of research before I attempted this...and much of it was wrong.

I used a HD to USB adapter to do all this. Specifically the Apricorn Drive Wire Universal HD adapter. (SATA, IDE, laptop IDE)

I used partimage on Ubuntu to make an image of the first two partitions (in my case sde1 sde2).

I ALSO wrote down what partitions were where, what kind, and how big.

I then swapped drives and ran Gparted on the 1.5 TB drive. I deleted any partitions on it.

I made the following partitions in order so they would match the original. And I made them all slightly larger so that partimage wouldn't complain later (it still did once).

sde1 - 206MB EXT3
sde2 - 520MB XFS
sde3 - 10MB ext3 (it didn't show in the original, but I wanted (needed?) to make the partition numbers match

sde4 - then I made an extended partition for the rest of the drive (1.4TB)

sde5 - 140MB linux swap
sde6 - the rest of the drive XFS (1.4TB)

Then I used partimage again to write sde1 and sde2 to the drive.

Then I put it in and turned it on...it worked right away.


Of course it was attempt 5 that actually worked right away...I tried just doing one partition and then a firmware update (wrong) the first time I tried to copy the sde2 back over the partition was too small...even though it was larger than the original...so I had to re-partition the rest of the drive again...1.5TB...and the last attempt after re-partitioning...I forgot to copy the sde1 and sde2 over.

So this took me a couple of days until I got the right procedures (I had to screw the interface back to the drive every time I wanted to test it...then it took about 2 hours.

And I have a 1.5 TB NAS. BTW, the reverse was easy, I put the 500GB drive in the WD My Book, and it wiped it and reformatted automatically.