The house we moved into had a basic theater room, with everything wired into an equipment/storage room off the side at the back of the room.
I added a 24"deep shelf at the bottom of the existing shelves and widened the one above it to 24" deep., and just stacked stuff there, and on the other shelves. It was a messy mess of wires, but it worked. However to do anything required a lot of maneuvering.

I wanted something more useful, so did a bunch of research...and found out about equipment racks.
The one I settled on wasn't cheap, but made the most sense in my setup.


Yes the whole rack slides out...AND rotates! In the above pictures you can see the frame I built to mount the thing on...it has to be sturdy enough to hold all the equipment without ripping loose.
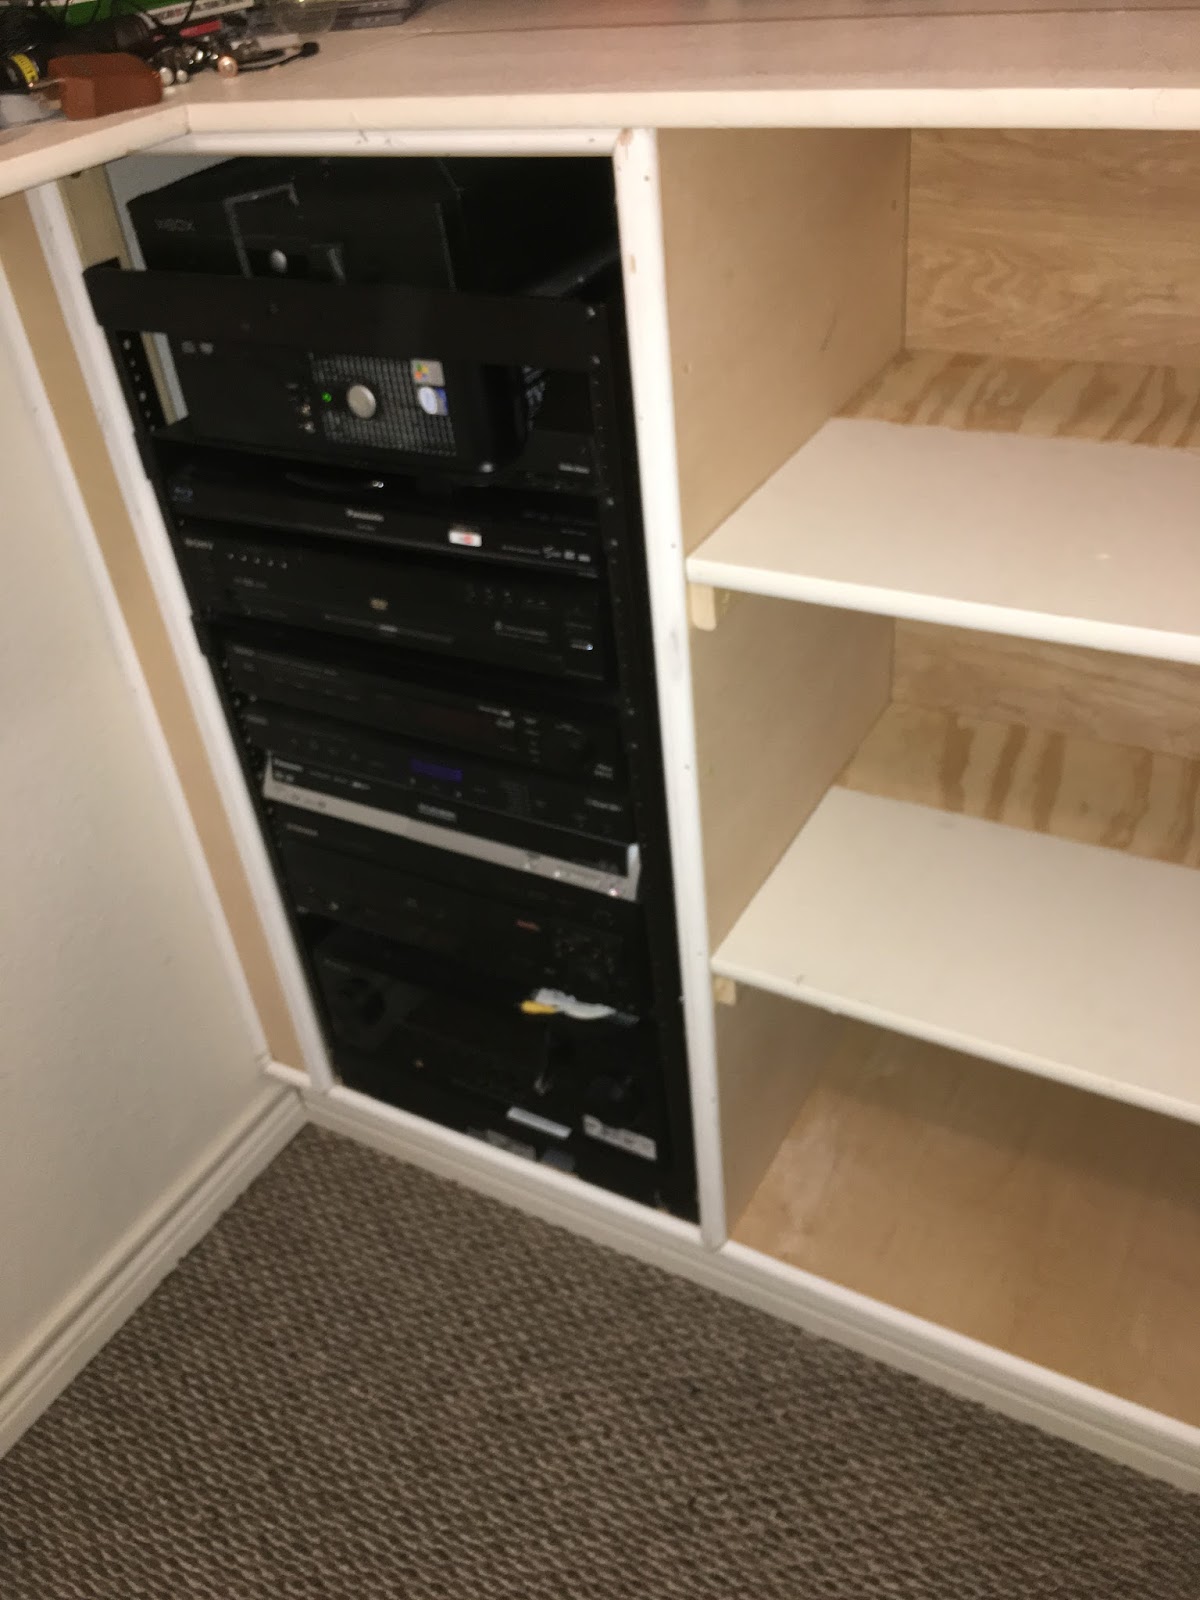
This rack was a 19" one (standard 19" wide shelves) like these...I ended up using one full depth shelf, the rest were these type shelves.

Here is the first filled rack...I have since rearranged it.

I continued to build out the rest of the enclosure...the idea was to make it look nice and be functional. You can see were I widened the shelf just above the rack...I used on of the old shelves, and routed the back so it tucked in nicely with the bull nose shelf behind it.


Oh yea, the walls are scewed, like a trapezoid...so I had to square the center from the back wall, and gave the shelves a slight taper to they fit right in.

I reused a lot of material that came out of the original shelves, partially to be frugal, partially so the styling would match what was already there.
So in the above picture I used the original shelves, then added a piece of plywood to make them deep enough. You can also see where now there is trim, and the gap at the left of the rack is filled.

Now backtracking a bit...I wanted the wiring to be somewhat orderly, out of the way, yet serviceable. The rack takes care of most of that, but I knew there would be times I needed more access. So, the shelves come out, the back panel comes out, and if necessary the right side of the equipment rack comes out.
So far I have already pulled the shelves and back panel to run some wire.
Now to the guts.

It is actually not bad for the first attempt...but all the cables were 6' to 12' long and so I had large coils...I am slowly removed all the long ones and puttin up ones that are just right.

Power is another issue, There were originally no plugs back there...so I wired into the one that I did have in the closet, and mounted two surge protectors back there...I don't have a power conditioner, but I do have a space to mount one.


You can see that the back of the rack has a stationary piece to tie all your cables into...then bind them together up high so they have somewhere to go when the rack is pushed back, signal wires are run on the opposite side of the rack.
And finally, the 'completed' working setup.


No comments:
Post a Comment